INTRODUCTION
Hello there, my name is Zack Ciminera, also known as Zacxophone. I live in France, near Annecy. I started doing 3D for fun and to learn something new in 2019. Since then, I have continually made models and experimented with things related to 3D. Today, I make my own animated models and sell them!
INSPIRATION
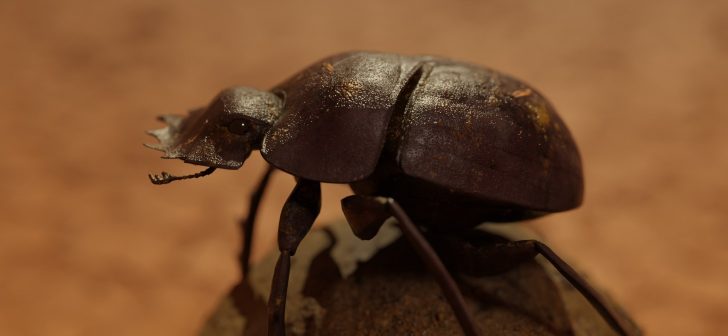
I mainly find my inspiration in nature. I have always loved learning more about the lifestyles of insects, plants, and animals. I often watch documentaries. For this beetle, I came across a video on YouTube with very cool shots showing the life of a dung beetle.
I was really interested in its way of life and hypnotized by its movements. So, I decided to try to reproduce it as faithfully as possible!
PROCESS
Like almost all of my works, I do the textures with Substance Painter and everything else with Blender. For this beetle, I started from scratch, with only a few reference images and videos of a sacred scarab.
MODELING
I started by roughly modeling the main shapes of the beetle. Because I plan to animate it, I separated all the parts of it (legs, mandibles, head, body, eyes, etc.) to make it easier to rig later.
SCULPTING
I have rarely sculpted in my previous works, so I decided to practice a bit during this project. I simply used Blender's basic brushes with the Dyntopo option to add details related to a real beetle.
RETOPOLOGY
Once satisfied, I made a retopology of my sculpt. For this, I started with a plane and added subdivision, shrinkwrap, and mirror modifiers. Then, I created quads by hand until covering my entire mesh.
UV MAPPING
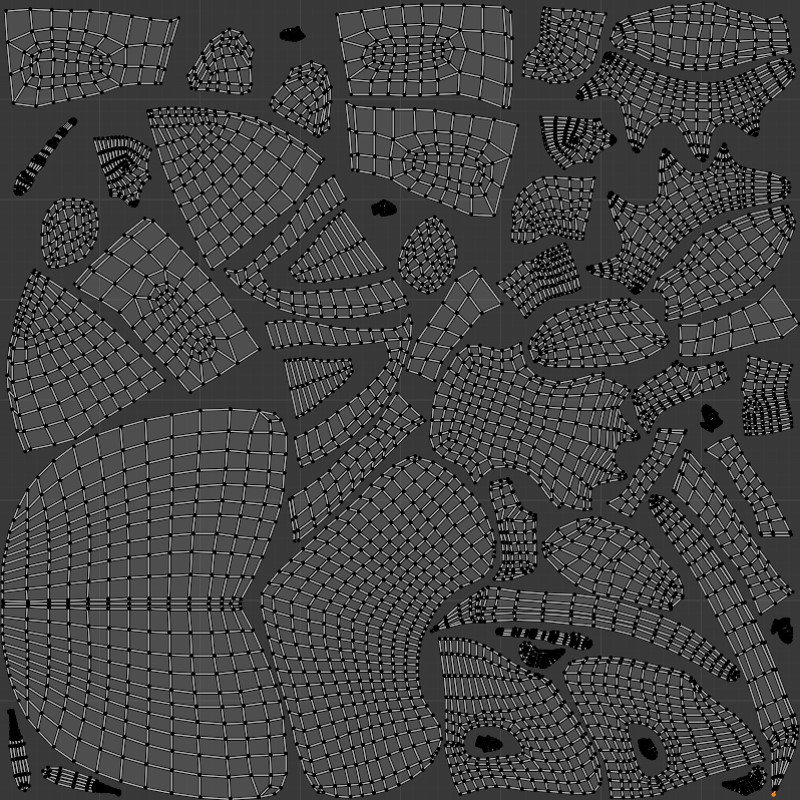
I applied all the previous modifiers and placed the seams. I unwrapped the whole mesh and reorganized the UVs by hand to cover as much space as possible.
RIGGING
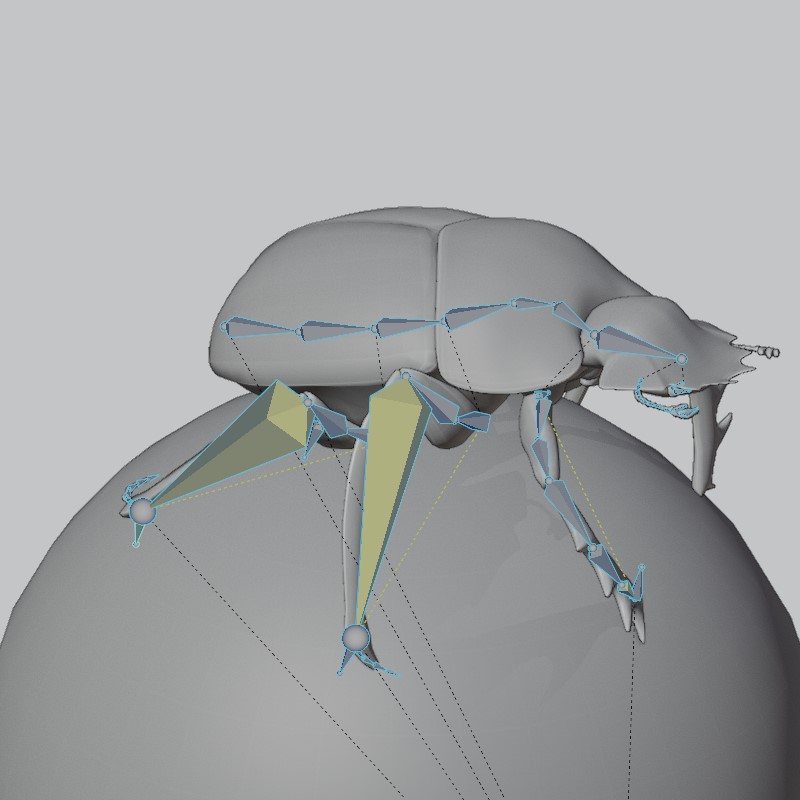
I rig my mesh before texturing it. That way, I can put it in a more natural position and adjust the different parts if needed. The rig is quite simple; I add bones for all parts of my scarab. For the legs, I add an IK modifier, then I symmetrize the whole rig. I use the automatic weight option and readjust the weight of specific parts in the weight paint mode.
TEXTURING
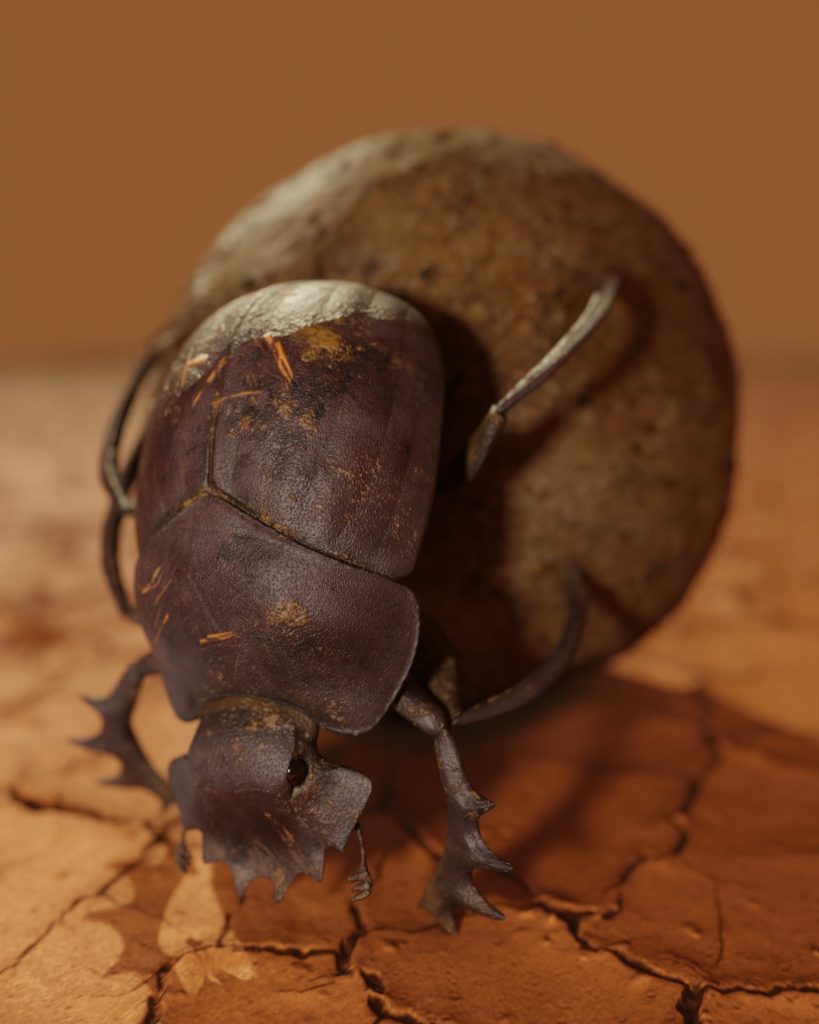
Once I export the low poly and high poly mesh from Blender, I import my low poly one into Substance painter and bake the Mesh maps (Normal, curvature, Ao etc.) using my high poly sculpted one. Then I add several layers for the basic colors, little details, dirts, etc.
In the meantime, I created the ball. Nothing specific to talk about; I just placed a dirt texture on a sphere!
Turntable showing all the previous parts.
ANIMATION
Once my model is ready, I can start the animation! My process is quite simple. I roughly animate the main motion by adding keyframes, then I continuously refine and polish it until I get something that satisfies me. I always start with the looping animations (walk and idle here) then I create the transition between them. I also carefully watch (and rewatch (and rewatch)) the video in detail to precisely reproduce the movements.
RENDER
Because I always have a lot of frames to render and don't want to spend days computing my animations, I have taken the habit of rendering my animations with Eevee. To get a nice render, I add motion blur, depth of field, HDRI, and lights. But for still shots I use Cycles because it captures the realism I want.
ANIMATED DUNG BEETLE
Animation Bonus:
And that's it. Thank you for reading my article.
I hope you have a nice day!
About the Artist
Zack Ciminera, a 3D animator from Annecy, France. He creates and sells his own animated models on Sketchfab.







1 Comment
I get inspired by work like yours. Well done